First of all, let me say that this page is here for the sole purpose of helping others.
I have been helped many times when I just wasn't sure what to do. And many of those ideas were incorporated into my projects. I am always looking for quicker, cheaper and easier ways to produce better enclosures and racks. Building them has become almost as much of a habit as my reptiles.
The rack on this page is one that I built 3 months ago. Based on many other ideas and past mistakes I had made. I DON'T claim to have invented anything on this page. Of course not. Oh my gosh, hundreds have built racks with so many variations and creative ideas. This rack is based on the idea that you don't have access to a table saw but you do have access to pre fab shelving. If you want to alter the design and idea to suite your need, go for it.
I would love to see what you came up with. But remember, ALWAYS help others to get started. That's what makes this so much fun.
DISCLAIMER!: Build this rack at your own risk. I don't warrant the ideas or the process. As for the wiring part, I have to suggest you get a licensed electrician to do that for you.
I do NOT give wiring advise because everyone wants to blame you for their mistakes these days. I am just showing what I did. Ok, enough of the fine, boring print...
Here we go...
(Click any photo to enlarge)
 |
FYI: There are a couple of things I did in this design that I now wish I had done differently. This is what I built to house my hatchling and yearling corns. Remember, you can click on any photo so see a larger version. A new window will open with the larger photo so you will have to close it to continue. This design was based on the use of Rubbermaid's 2220 and 2221 tubs. The reason for this is that with the 36" wide shelf, I can put a combination of the two tubs because they are the exact same height. And two of the 2220s = one of the 2221s. Having said that, I hear that Rubbermaid is now discontinuing all of their tubs. If so, you can use any other brand with this design. Plus, you can alter the width or depth to accommodate the other tubs. |
||
Below is a list of supplies and totals: Also, when I make this one again, there are a few things I would do differently to improve |
|||
Here is a list of supplies: |
Totals: |
 Prefab Shelf Label |
|
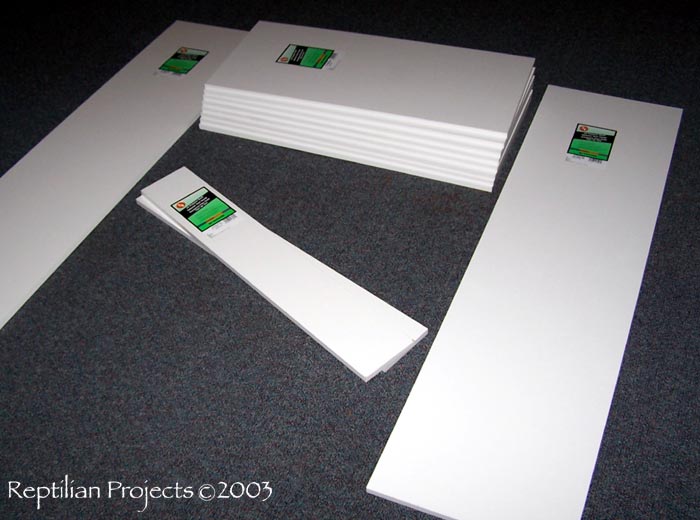
I used prefabricated shelving I bought from Menards. For those who don't have a Menards, it's like Home Depot or Lowe's. The shelving is only 5/8" thick and laminated on all sides. It's much lighter than the 3/4" melamine and nicer. But it's still heavy. Cost is almost the same when you consider the waist of cutting a full 4' X 8' sheet. You might save a few dollars but remember, this project requires NO table saw and all edges are finished. PLUS, the prefab shelving is more moisture proof I have found |
|
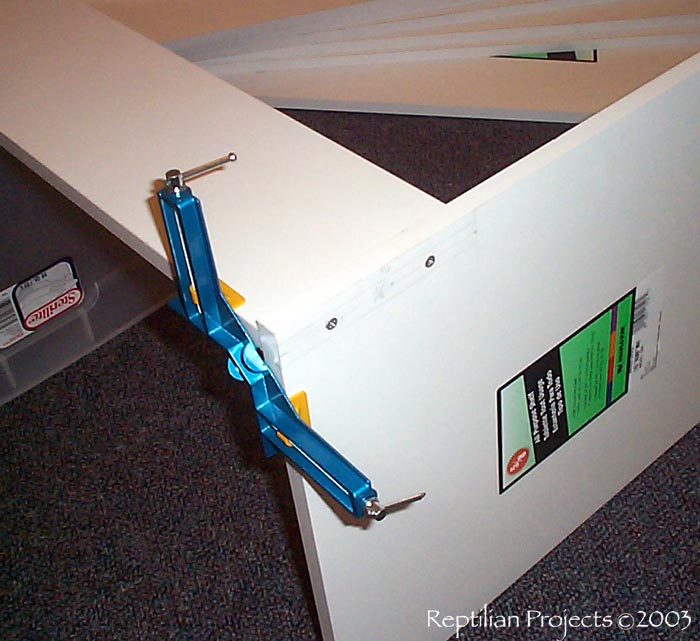
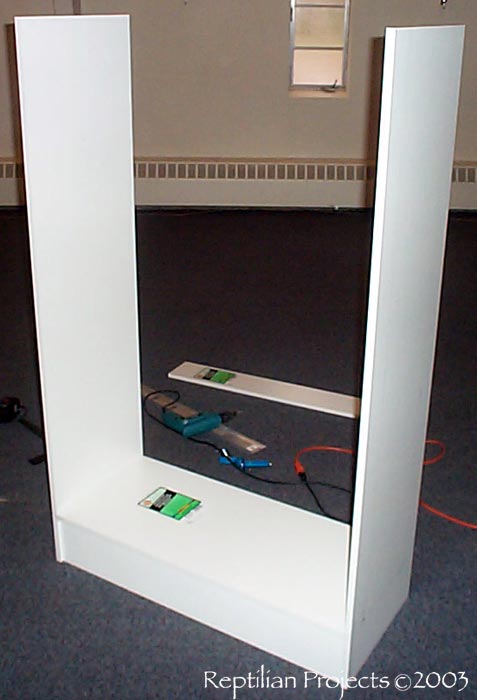
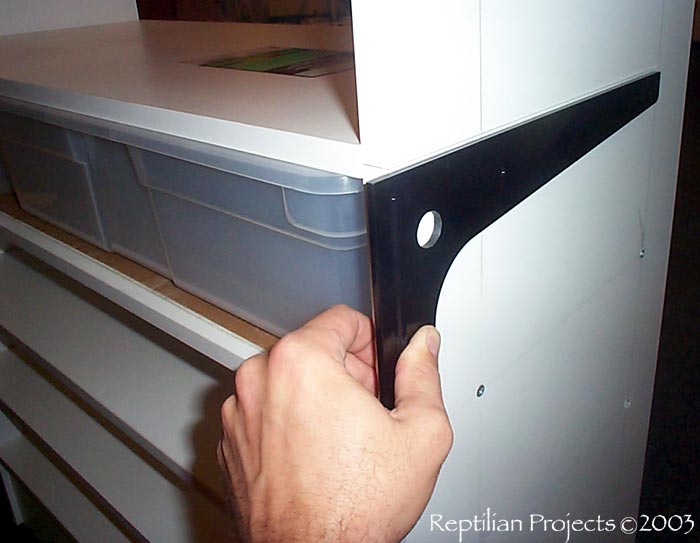
First I started with one of the 6" wide shelves and one of the 16" X 60" shelves. I used a cheap corner clamp from Menards to help hold it square. You want to get your first few boards on perfectly square then the rest of the rack just falls into place. The 6" board you see to the right will end up being the front/bottom. It's a kick plate. I set it back 3/8" from the edge of the riser just to add a little design to it. If you want to shave cost off this rack, don't put a kick plate on it. Just start your first level about 2 1/2" from the bottom and you might even get another level on this rack. (Please see my "Ladder Rack" for a picture of this method.) |
|
 |
After you get both risers attached to the 6" kick plate, you want to start at the Be very careful to get this first level shelf (a 16" X 36" shelf), straight and square. There is nothing supporting the back of this level until you get your screws in place. All other levels will echo this first shelf. Make it un level and all others will be un level. |
||
Now, stand the rack up. Look, you have the hard part done. Yayyy! Now, lay a scrap piece of melamine sheeting on the first level shelf. Then put your Rubbermaid tubs on that. Now, position your second shelf on top. Put two screws in each side. The melamine sheeting gives you a spacer for heat expansion and irregular tubs. Now pull the tub out and remove the sheet spacer. Yea, it's hard to pull it out, I know. Don't panic! |
 |
|
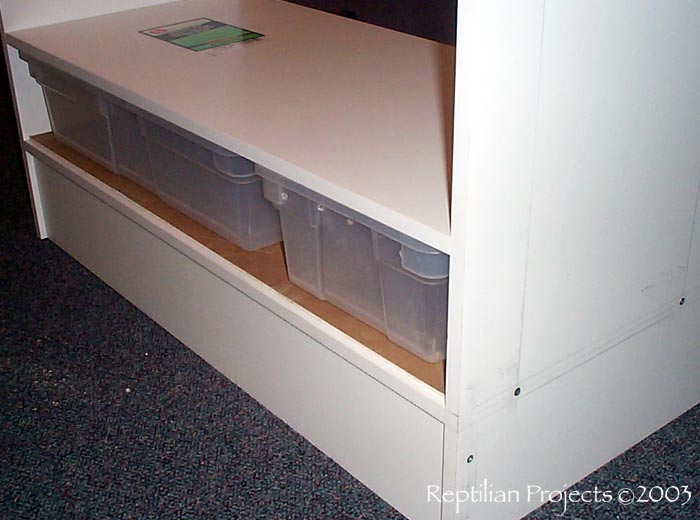 Now test your tub without the spacer, see how easy it slides in and out??? |
|
Continue this process all the way up to the last level.
|
|
Above I used a square just to double check how my shelves are doing as I go up. Here I am using the square to mark straight lines where I want to drill my holes for screws. |
 |
|
|
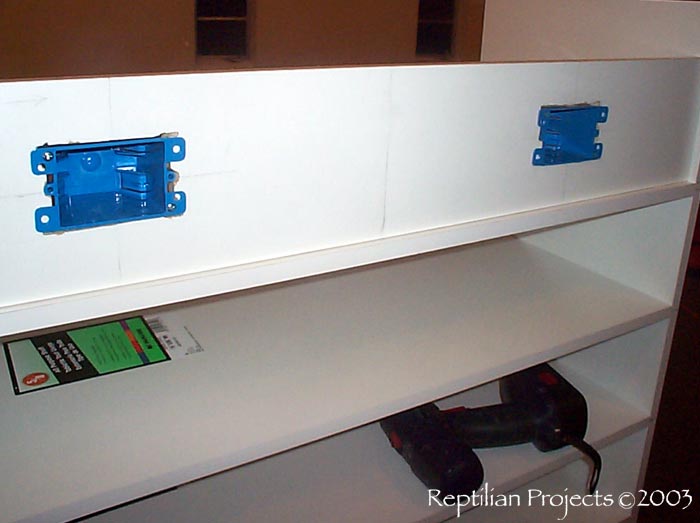
When you get to the top, attach the other 6" shelf in this manner. This is one of the areas I wish I had done differently. I will get to that later. |
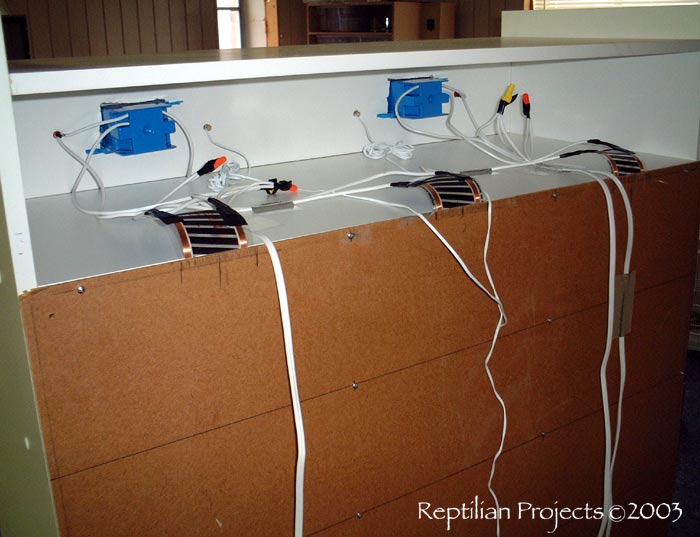
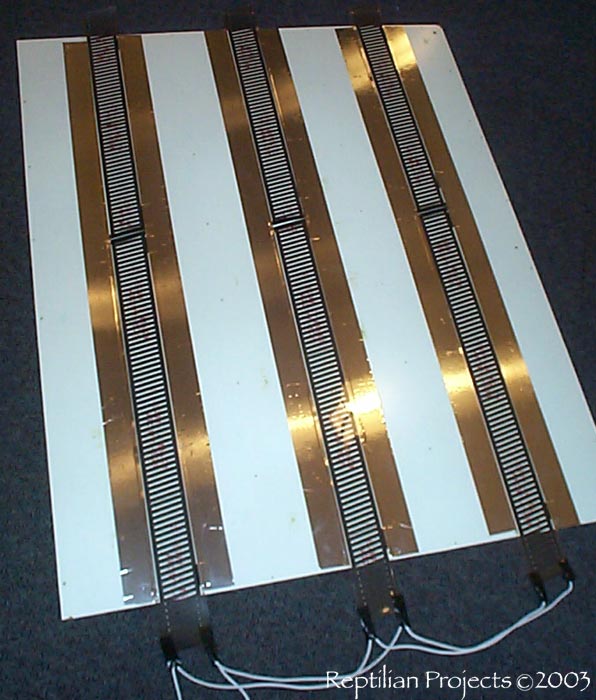
Ok, so now we are read to attach the back, and consider heating. If you look very close, you will see 3/4 of the way up, each strip of tape has been severed. (Update 1-29-04. I have decided that the use of back heat in this manner is not as affective as bottom heat. This applies to this application only of course. There may be uses where back heat is better. But I have now modified this rack to use bottom heat. My tubs were not touching the heat tape in the back enough because of the wide lip on the top of the tub. So the tape was reaching too high of a temp. Your tubs may be different. Just wanted to update this design with my experiences.) |
 |
|
|
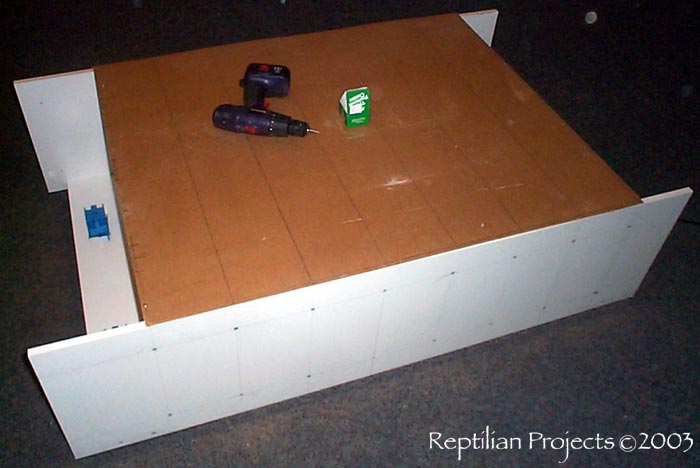
Now you lay the rack on it's front and attach the back using small screws. BE CAREFUL that you don't run a screw through the spot where you attached the heat tape. There is plenty of room for screws, so take your time and mark everything off. |
|
Now it's just a matter of wiring all this together. As you can see, it is a mess back there. I won't even try to explain this part. To much liability. I hope you understand. I will suggest you have a licensed electrician do it for you. Or better yet, look at the "improvements" at the bottom of the page and avoid this costly mess. |
|
|
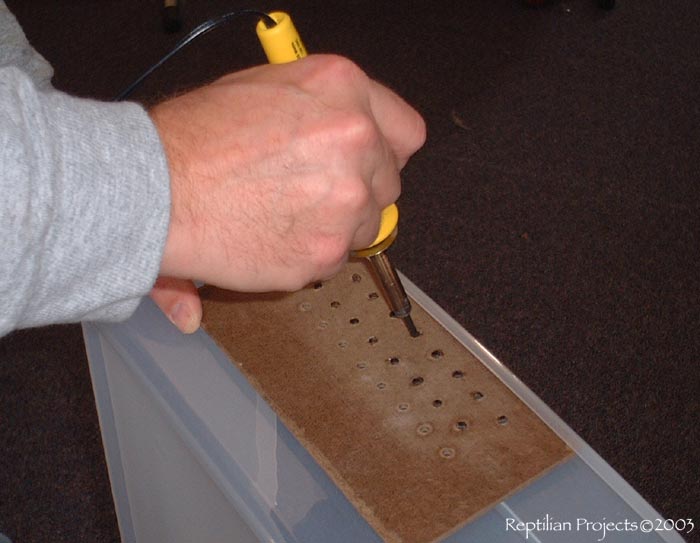 |
Ventilation Holes in tubs: I use to drill my holes with a 1/4" drill bit. Then I heard someone mention a couple years That's just plain brilliant. (This WAS NOT my idea. I don't know who to credit, sorry.) Here's what I do. I made a template out of a scrap piece of masonite or melamine sheeting. DON'T try to burn the holes all the way with the template in place. It will weld the template |
|
Now, you can go back and "push" in all of your holes where your marks are. Oh, I bought the soldering iron at, you guessed it, WalMart. $9.99 |
|
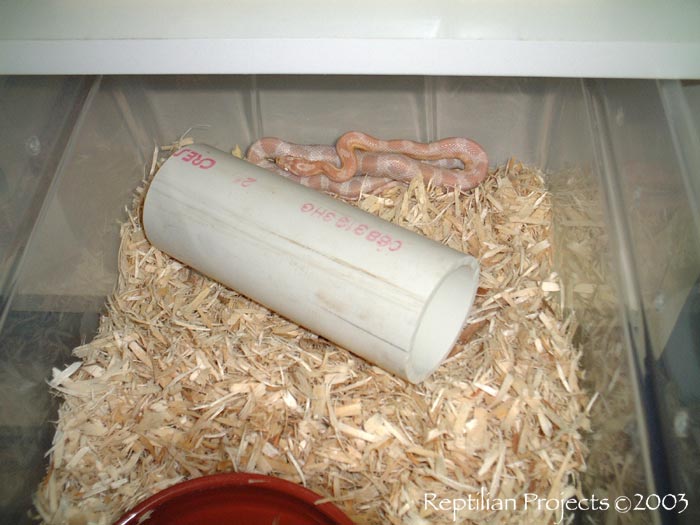 |
Ok, you have your hatchling rack. So, how fast can you fill it up? For me, I had it full before it was finished. I have two of these racks now. I may build a third with the improvements listed below. To the left is one of the Rubbermaid 2220 boxes with a yearling Snow Corn we purchased from Katharine and Eli. at AAA Serpents. |
|
IMPROVEMENTS: First of all, unless you already have a supply of Rubbermaid tubs, don't use them. If you want to use them, go buy them Second, I prefer the method of just wiring all levels on one heat control. But rather than using the sliding dimmer switches, the Another change I could have made was the removal of the kick plate. And then start my first level almost to the floor. Stay about 2" above the floor so you allow room ambient air to circulate under that bottom shelf. And since I won't be using dimmers and pilot lights, I can eliminate the top 6" "control central" giving me more than enough room to add one more level. Also, when you attach the heat tape to the back, leave 6" extra and let it come into the lower shelf and tape it down. That will offset any cold floors. |
Please be sure to check out my "Ladder Rack" design also.
All content within this website is the sole property of Reptilian Projects. All rights reserved. |